
What Is a Stage Plot and How to Create One for Your Gig
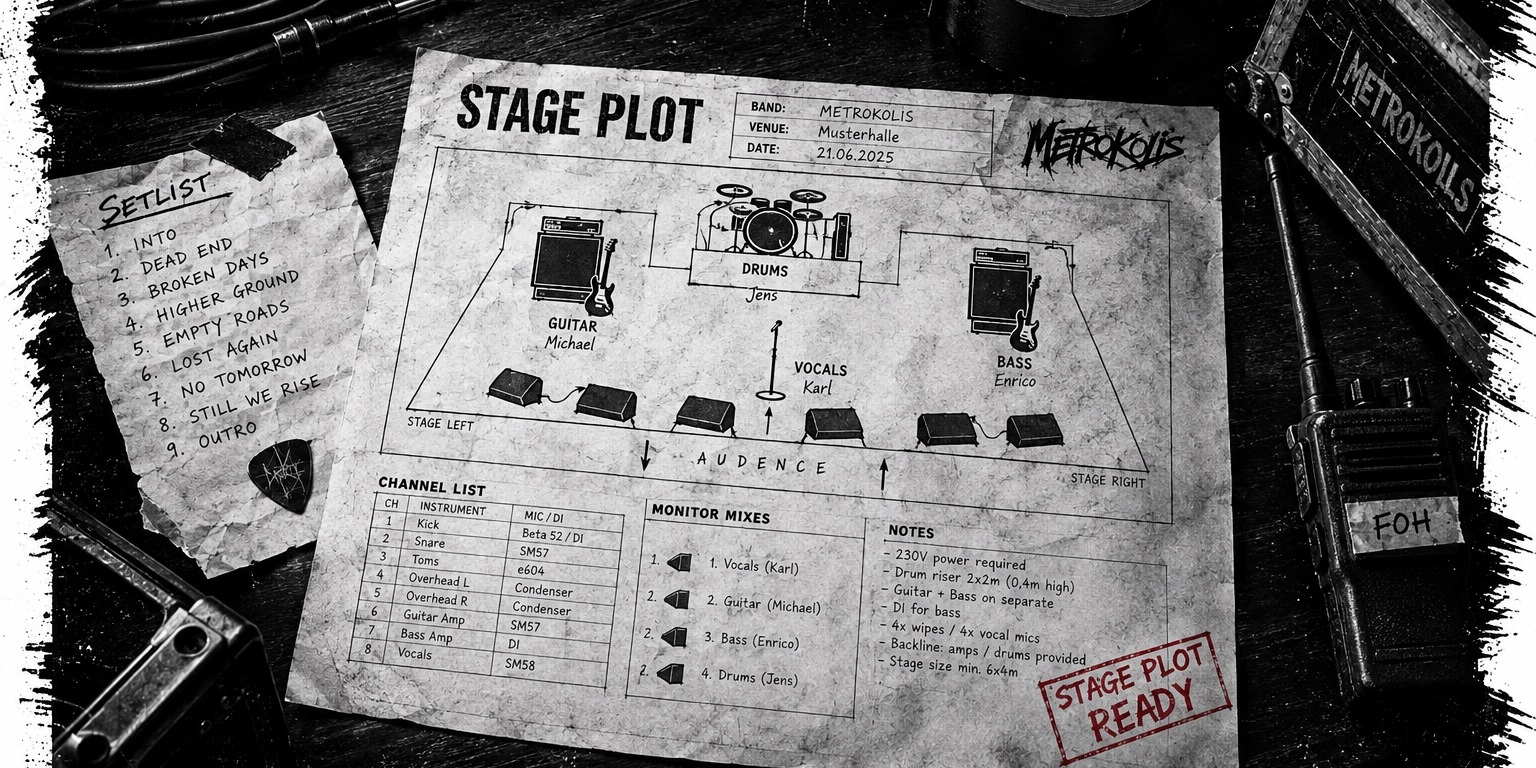
If you've ever shown up at a venue and spent the first 20 minutes trying to explain where everything goes — that's the problem a stage plot solves.
A stage plot is a simple diagram that shows the venue, sound engineer and stage crew exactly how your band is set up on stage: who stands where, where the amps and monitors go, what microphones you need, and how everything connects. Hand one over before soundcheck and you'll spend less time talking and more time playing.
This guide explains what goes into a good stage plot, why venues ask for them, and how to create and share one quickly — even if you're a solo artist or a small band with a simple setup.
Why Stage Plots Matter
Sound engineers and venue technicians see dozens of acts. A clear stage plot means:
Faster soundcheck — the crew can set up in advance, before you arrive.
Fewer mistakes — no guessing which monitor feed goes to which performer.
A more professional impression — venues remember acts that make their lives easier.
Smoother handovers — if you're on a multi-act bill, every minute counts between bands.
Even if you play small pubs with no dedicated sound engineer, a stage plot forces you to think through your setup before the day — which saves stress on the night.
What to Include in a Stage Plot
A useful stage plot doesn't need to be beautiful. It needs to be clear. Here's what to cover:
1. Stage Layout and Orientation
Mark the front of stage (facing the audience), back, left and right (from the performer's perspective, facing the audience). This matters because "stage left" and "stage right" are from the performer's point of view, not the audience's — easy to get wrong.
2. Performer Positions
Show where each band member stands or sits. Label by name or instrument (e.g. Vocals/Guitar — centre front, Drummer — rear centre).
3. Instruments and Backline
Mark every piece of backline equipment: guitar amps, bass cabs, keyboard stands, drum kit. Note the brand and model if relevant — some venues provide backline and need to know what to match.
4. Microphone Positions
List every mic you need, with a rough position on stage. If a mic needs a boom stand, a straight stand or a clip, say so.
5. Direct Inputs (DI Boxes)
Note any instruments going direct into the desk rather than through an amp — keyboards, acoustic guitars, laptop outputs and so on.
6. Monitor Preferences
Indicate how many monitor mixes you need and roughly what each performer wants in their mix (e.g. more vocals, drums and bass only). Even a rough guide helps the engineer.
7. In-Ear Monitors
If any performer uses IEMs instead of stage monitors, note this — it requires a separate send from the desk.
8. Power Requirements
If you have unusual power needs (a lot of rack gear, a lighting rig, a fog machine), flag it so the venue can check capacity.
9. Contact Information
Add a phone number for your sound person, band leader or tour manager. If something needs clarifying, the venue can reach you before the night.
A Note on Stage Plot Formats
Stage plots traditionally come as a PDF or image file sent by email. Many venues now expect them attached to the booking confirmation or rider. Keep yours:
A single page — if the engineer has to scroll, it's too complex.
Clearly labelled — use plain text labels, not just shapes.
Up to date — if your lineup or gear changes, update it.
Stage Plots for Solo Artists
You don't need to be in a full band to benefit from a stage plot. As a solo artist, a simple one-page layout showing your position, your instrument(s), your monitor preference and your DI or mic setup is all a venue needs.
For acoustic solo acts, a stage plot might be as simple as:
One position, centre stage
One acoustic guitar, DI box
One vocal microphone, boom stand
One monitor, centre front
One IEM send (if applicable)
That's five lines of information — but it tells the venue everything.
Common Stage Plot Mistakes
Too vague — "guitar amp on left" doesn't tell the crew anything about mic placement or proximity.
Out of date — sending last year's plot when your lineup has changed causes confusion on the night.
No monitor detail — monitor mixes are the thing most likely to cause friction at soundcheck. Even a rough guide is better than none.
Missing contact info — if the venue has a question the day before, who do they call?
Not shared early enough — the ideal window is at least a week before the gig, when the venue is putting together their input lists.
How Set Buddy Handles Stage Plots
Set Buddy includes a built-in stage plot builder, so you can create your stage setup information and share it directly from your gig in the app.
Instead of emailing a PDF and hoping the venue received it, you can:
Build your stage plot inside Set Buddy once, then reuse it across gigs.
Share it with venues and sound engineers using a private link — no login required for the recipient.
Keep it alongside your setlist, equipment checklist and gig details in one place.
If your band members each have their own monitor preferences or equipment notes, you can document that per-member so nothing gets missed.
Creating Your First Stage Plot: A Step-by-Step Summary
Start with the stage orientation — mark front, back, left and right.
Place your performers — by name or instrument.
Add your backline — amps, cabs, drum kit, keyboard stands.
Mark microphone positions and stands.
Note DI boxes for any direct inputs.
Add monitor requirements — how many mixes, rough preferences.
List power needs if anything is unusual.
Add a contact name and number.
Share it with the venue at least a week before the gig.
Summary
A stage plot is one of the simplest, most professional things a gigging band can bring to a show. It takes 20–30 minutes to put together properly once, and saves that time back (and more) at every gig that follows.
If you're still explaining your setup on the night by pointing at cables, a stage plot is the fix. And if you want to keep it alongside your setlist, equipment checklist and gig preparation all in one place, Set Buddy is built for exactly that.